Was your lash lift unsuccessful?
It is unlikely that inefficient solutions are solely responsible for an unsuccessful lift; technician error is likely a contributing factor. Please review the following recommendations. Please do not hesitate to contact us if you continue to experience difficulties after attempting all of the troubleshooting steps.
How did you prepare the lashes?
The preparation of lashes is important when preparing lashes for a chemical treatment. The correct pH level is required for the proper operation of solutions intended for use on lashes. Given its high pH level, an alcohol-based primer is not advised for lash preparation since it can dehydrate the lashes excessively prior to application. Please make sure you are not using a lash primer you would use for lash extensions.
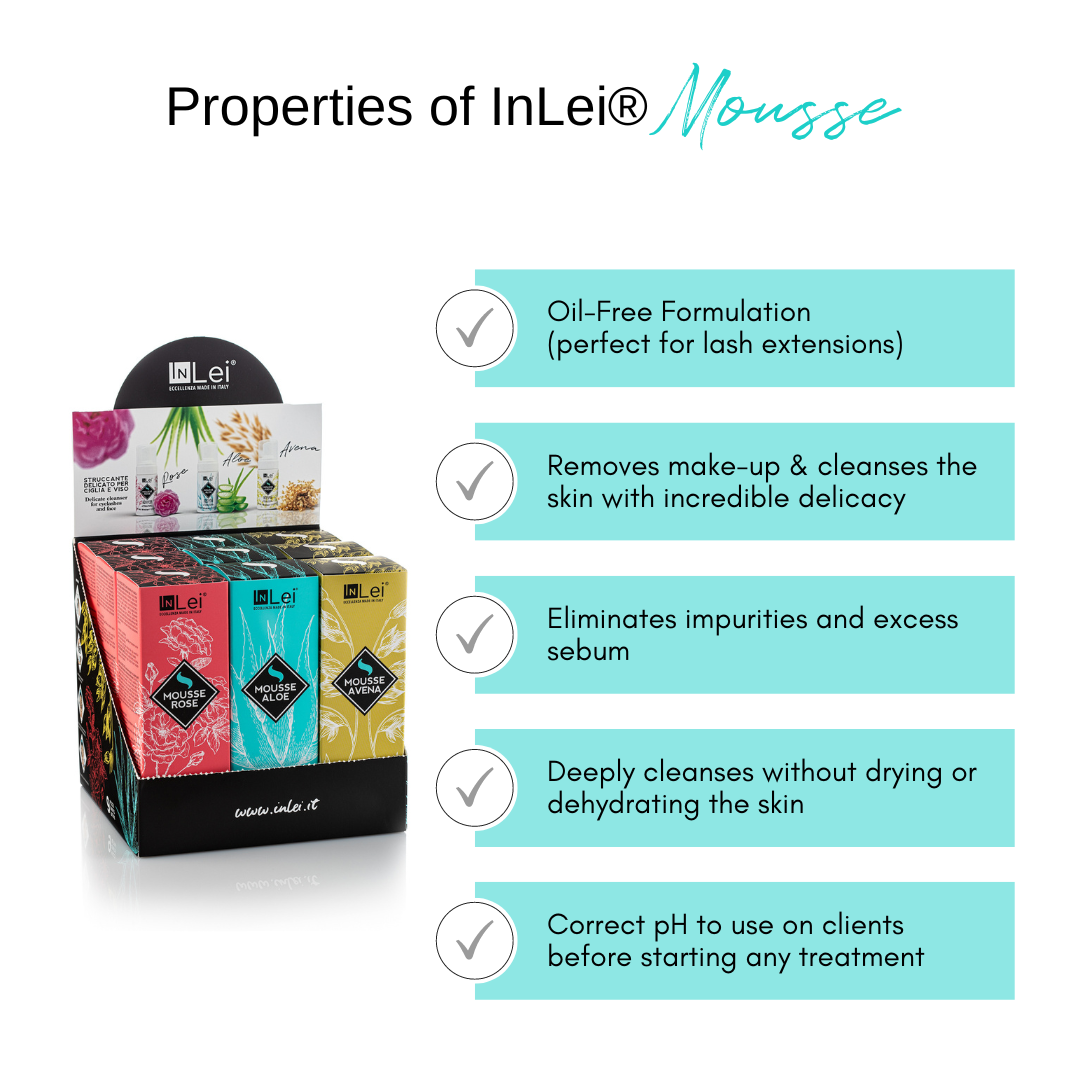
InLei® Mousse
The first step is to remove any makeup and mascara with the InLei® Foam Wash (pH 5–6/Neutral). Cleanse the entire eye area thoroughly. Lashes must be carefully washed to guarantee that all dirt and debris are removed completely. The accumulation of residual makeup or other particles on the lashes may cause a barrier for the solutions to reach the natural lash, resulting in an uneven lift.
Following that, the second process entails the use of distilled water to rinse off the foam wash, ensuring the full removal of all residue. You should fully dry your lashes with a fan before applying under-eye pads.
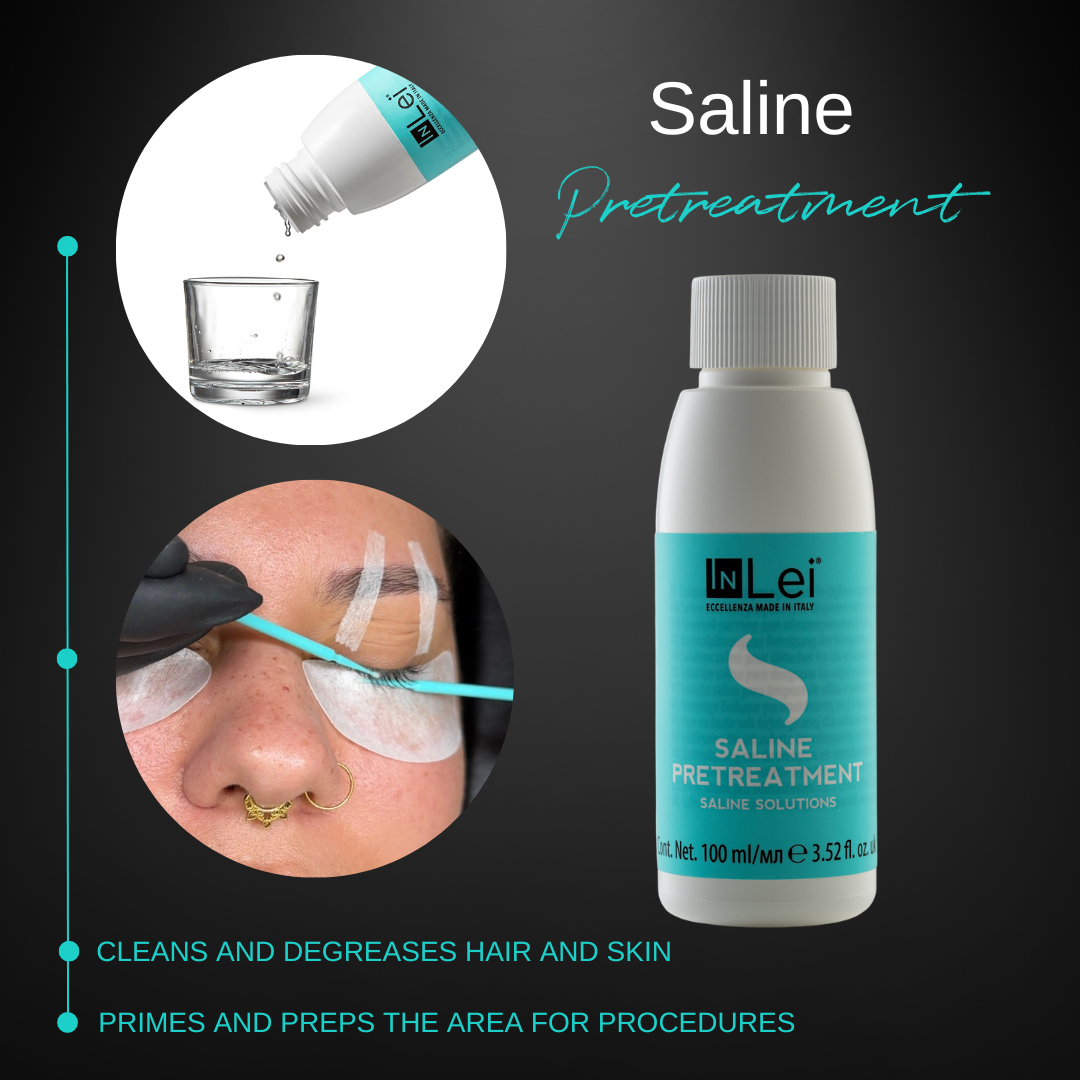
InLei® Saline Pretreatment
The final step is to cleanse the lashes with InLei® Saline pretreatment. This step ensures that each strand of hair is free of dust, cosmetic residue, or excess oil, allowing for a more precise and sanitary application of the product.
What did you use for glue?
The InLei® professional product line is meant to work together. This also applies to the adhesive. Both the Fixing Gel and the Lamica Gel are water-soluble and designed to aid in the penetration of Form 1 and Fix 2 into the natural lash, provided that excessive amounts are not utilized and that Form 1 is used within the time frames stated.
The problem may be a considerable issue for people who use an alternate type of glue. If substitute brands have a denser texture that prevents seepage through the adhesive, the InLei® products may not penetrate the lash within the specified time. Form 1 would be unable to break down the disulphide bonds. Therefore, no lifting would take place.
How much Glue | Gel did you use?
When sticking the lashes to the shield, using too much fixing or Lamica gel can result in a significant buildup of adhesive on top of the lashes. As a result, the solutions may have difficulty breaking through the adhesive and reaching the internal structure of the lashes. Depending on how much glue is on the lashes, you would need to increase your timing by 2 or 3 minutes.
When you removed all of the gel from the lashes, there would be nothing holding them in place, resulting in the lift 'dropping' or not working because the solution could not break down the hair's disulphide bonds.
To remove excess glue, simply wet the end of a cotton bud and rub it along the area that is affected. Always dry the same area with the dry side of the cotton bud so the hairs remain locked in the glue and do not loosen further.
What TYPE of shield did you use?
When deciding on a silicone shield size, take into account both the length of the client's natural lashes and their eye shape. Various ranges of silicone shields, such as InLei Only and Only 1, can be utilized to achieve the desired final effect.

Natural VS Dolly Shield
Various ranges of silicone shields, such as InLei Only (DOLLY) and Only 1 (NATURAL), can be utilized to achieve the desired final effect. They are available in sizes ranging from Small to XXL to precisely accommodate each client.
The InLei® Forma shield is considered a universal shield, so it does not have a flat bend and comes in only one size. Forma shield lifts are in-between the Dolly and Natural shields. These are great for long lashes that have a slight curl to the natural lash. I would not recommend using these on small lashes or downward-pointing lashes.

Straight or Downward-Pointing Lashes
You must consider how the client's natural eyelashes will grow back in comparison to the lifted eyelashes. With straight or downward-pointing lashes, the angle should be reduced so that the lashes align more naturally as they grow back out.
For these lashes, where the lift is needed more in the belly, always use the Dolly shield. The Natural Shield has a higher lift in the root, while the Forma is somewhere in the middle. Forma can be utilized when the lashes are straight but not pointing downward.
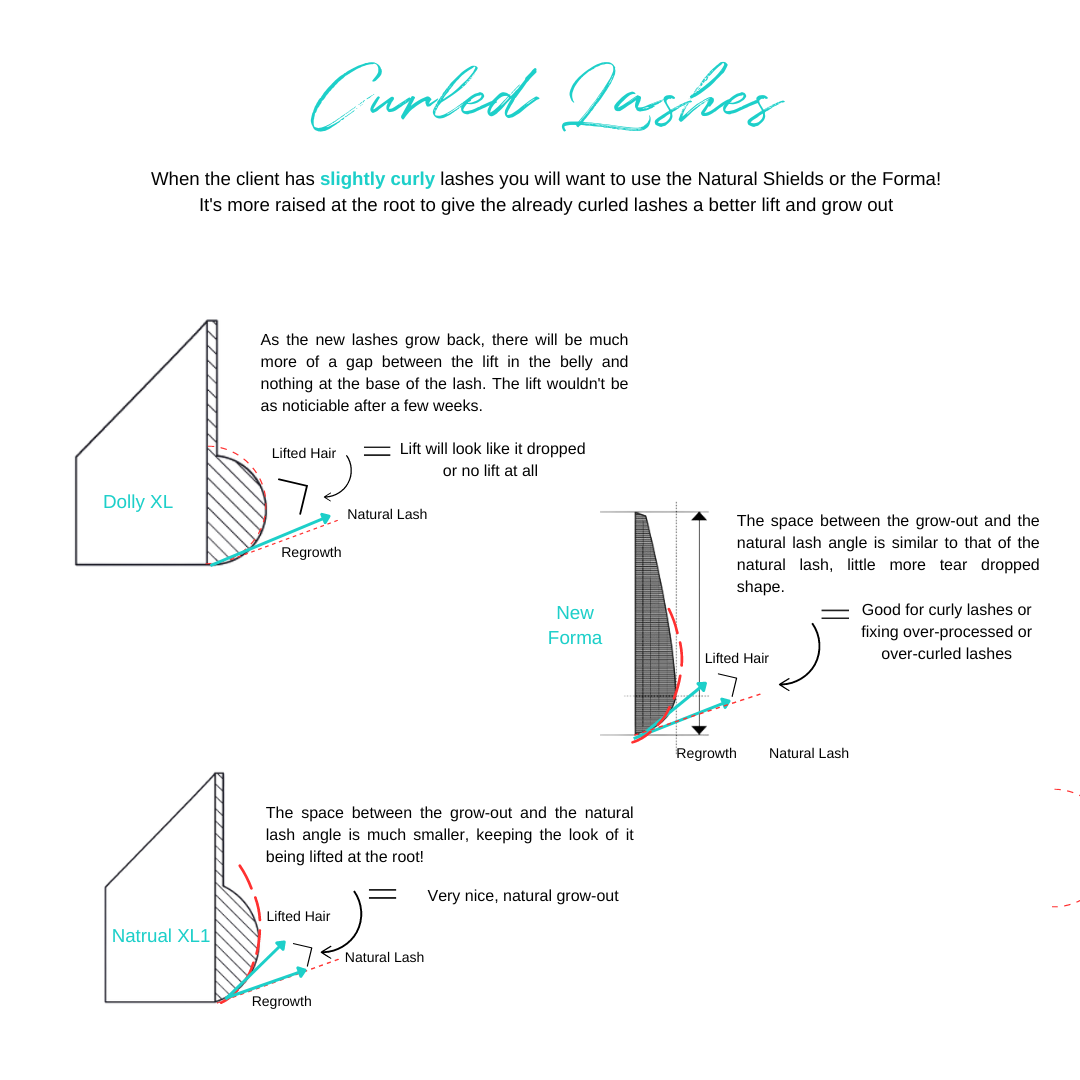
Lashes that have a Natural Curl
I would recommend the Natural Shield or the Forma Shield to those who already have a curl or a slight curl to their natural lashes. Both will provide a significant lift, particularly at the base of the lash, which will seem more consistent when natural lashes shed and regenerate.
What shield SIZE did you choose?
Back in the old-school days, we used to always go for the size small shield since we were informed that we would receive the maximum lift with this than any other size, even if their lashes were incredibly long. Toss that strategy out the window. Completely incorrect. You MUST choose the appropriate size for the client's natural lashes.

Proper Shield Size
It is advised that the lashes cover approximately 70 to 80 percent of the surface area of the silicone shield to ensure proper size.
If your natural lashes cover less than 70–80% of the shield bend, you should go with a smaller size.
If the lashes go past or too close to the flat bend, it is best to go for a larger size. This approach ensures that all lashes are correctly positioned on the shield, avoiding any inconsistencies or malformations in the lashes.
Did the Lift DROP or Not Lifted at all?
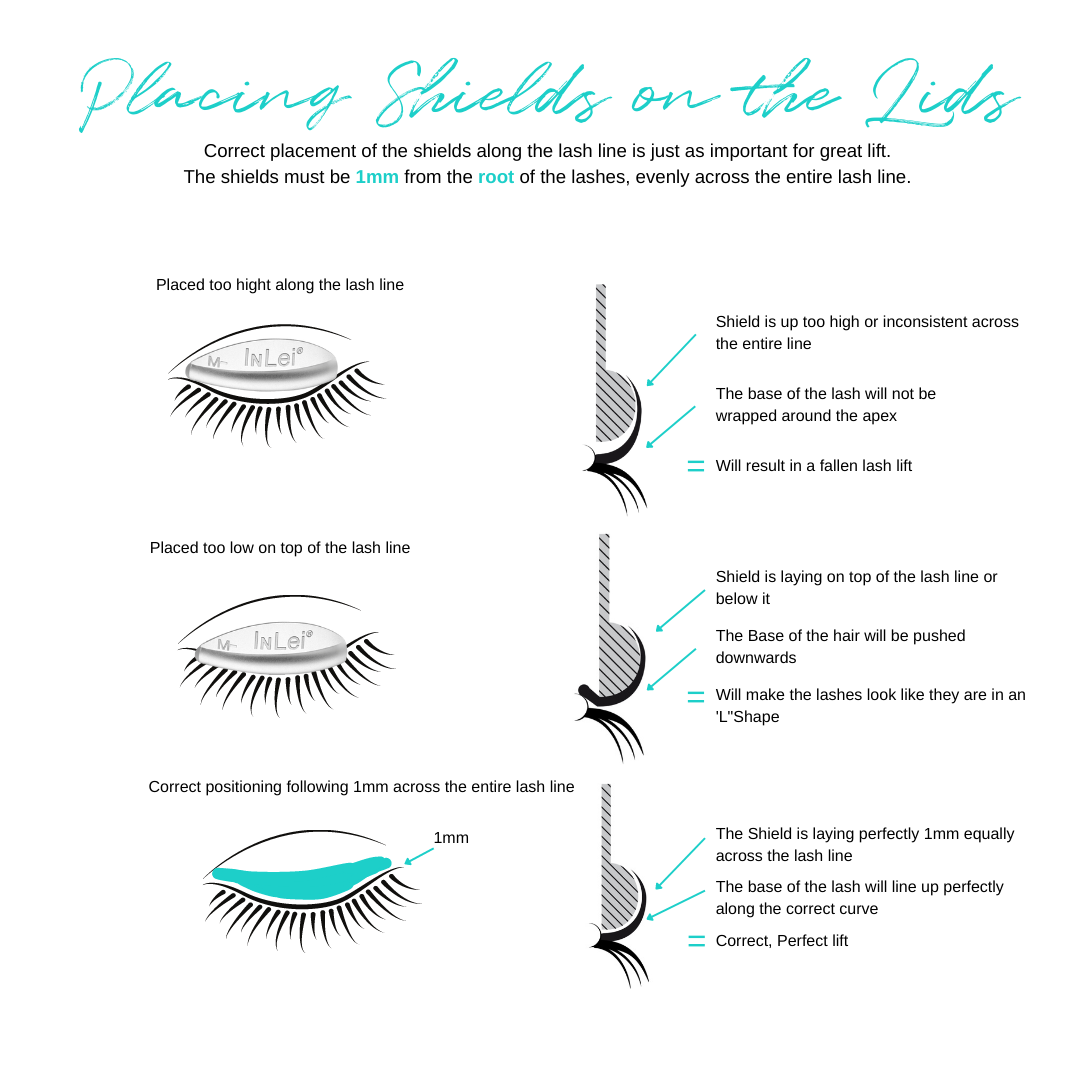
How Did You Place Your Shields?
Another reason your lash lift may appear to be dropping or did not take at all is where you lay your shield along the lash line. You must maintain a 1mm distance across the whole lash line.
The lifting portion of the Fillering Tool is 1mm, which is a wonderful tip. As a result, the width of the end should be able to fit between the lash root and the shield.
Where did you PLACE your solutions?
To achieve the best possible lash lift results, the product must be strategically placed. Inadequate or uneven application of the product may result in outcomes that are undesirable.

Placement of Form 1
To attain the best results, apply the lash product as close to the roots as possible (using the Vincent brush for precise placement) while keeping a distance of about 1-2mm. It is essential to avoid applying it directly to the roots.
The covering should not be longer than 3/4 of the lash length. It will usually be roughly half the length, depending on the length of the lashes, the type of shield, and how you want to apply the solution to fix any curvature challenges.
It is crucial to note that applying the product to the tips must be avoided since it may cause damage and overprocessing to the tips of the lashes, resulting in a kinked, unruly lash lift.

Uniform Placement
Do not be afraid to use too much product (but, be mindful of the cost of the product) because eyelashes can only absorb a certain quantity. In order to offer constant coverage of all eyelashes, it is necessary to emphasize the precision and accuracy of your application method. Should be uniform all the way across the entire lash line.
The Vincent Brush is the go-to for precision alignment.
How were your lashes ALIGNED?
The positioning of the lashes on the silicone shields is a crucial step in the Lash Filler lash treatment. It is vital to remember that the way the lashes are lifted and glued to the shield during this step of the treatment will ultimately define how they look. It is best to take your time and carefully lift each lash at a 90-degree angle, avoiding any crisscrossed lashes. The use of both the Fillering Tool and a Helper Tool will assist in isolating and straightening each individual lash with greater precision.
If you are having trouble with alignment, it is best to start with a smaller section of lashes. This method gives you enough time to raise the lashes before the Fixing Gel or Lamica Gel dries. The drying power of both gels is the same; however, the Lamica gel dries a little bit slower than the Fixing gel. The type of gel you use will be determined by how quickly you work. If you prefer a little more time to correct each lash and the tips of the lashes, then use the Lamica Gel.
If you are unhappy with the results of your lash lift section or if you have crisscrossed lashes, you can fix it by using a microbrush or a cotton bud dipped in water to dissolve the Fixing or Lamica Gel from the problematic area. Gently comb the eyelashes to remove any excess adhesive, make sure they are DRY, then restart the process.
TIMING for Form 1 * CRITICAL
To perform an in-depth evaluation of a client's lashes, analyze the porosity and structure of the hair, as well as the thickness of the natural lashes. If the product is not left on for an extended period of time, the technique may be proven ineffective. It is essential that you read our additional blog post on Hair Structure and Porosity to fully comprehend the significance of this topic.
You will not receive a lift if you do not leave it on long enough. Because InLei® is a mild product that does not damage the natural lash, choose the higher setting if you are hesitant. For instance, if a client's lashes are medium-rigid to fairly thick and shiny, aim for the 13-minute point.
Applying Fix 2 times are always: Half the amount of Form 1 plus 1 minute. eg 10 minutes for form 1= 6 min for fix 2

Have they had an InLei® Lash Filler Treatment before?
It is vital to take into account the likelihood of clients returning for lash services. The InLei® Lash Filler Treatment has been proven to improve the strength and shine of lashes with each treatment by improving cuticle tightness. As a result, the time necessary for the perming solution to penetrate the cuticle has increased in comparison to its previous structure. Before giving any kind of treatment, it is highly recommended that each client's lashes be thoroughly examined. It is also a good idea to keep a detailed client card to record the specific times and shields used for past appointments. You will notice that clients' lashes are improving in growth and density and that the shield sizes will increase with treatments, and times will need to be increased.
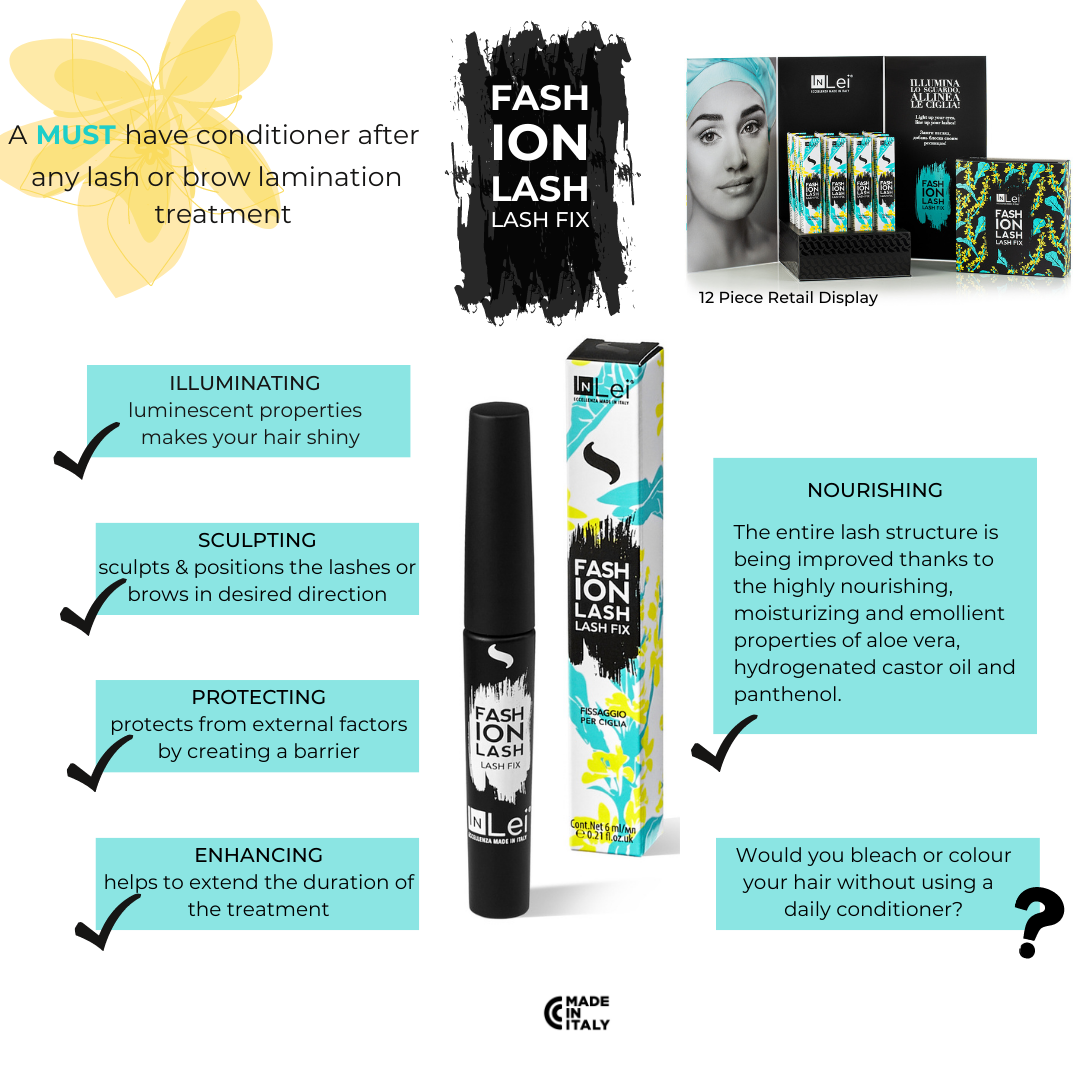
What are they using for aftercare?
Always suggest the use of Fashion Lash as their take-home conditioning treatment. It is imperative to inform clients about the significance of aftercare for lash and brow treatments. Consistent nourishment and maintenance can yield numerous benefits for the longevity and overall health of the treated area.